
If you’re planning to apply a long vinyl decal—anywhere from 3 to 10 feet—to a car, truck, or boat, getting the measurements right is critical. A decal that’s too short, misaligned, or stretched over curves can look amateurish. This guide shows you how to measure properly, what to keep in mind, and how to prep the surface so the decal lasts.
Why Accurate Measurement Matters
Long decals are large visual elements. Being off by even a few inches can leave gaps, cause misalignment between panels, or force overlap that leads to wrinkles and lifting edges. Vehicle curves, body lines, and surface transitions add complexity—planning for them up front saves time and avoids reprints.
Tools You’ll Need
- Flexible measuring tape (10 ft+ recommended)
- Masking tape and a level or straight edge for marking
- A helper (especially for longer runs or boats)
- Phone/camera or notepad to record dimensions
- Clean cloth and mild cleaner for surface prep
Step-by-Step Measurement for Cars & Trucks
- Clear the area. Park on a flat surface. Lightly clean the path so body lines and edges are visible.
- Decide placement. Commonly: start behind the front wheel arch, end before the rear bumper curve. Mark both with masking tape.
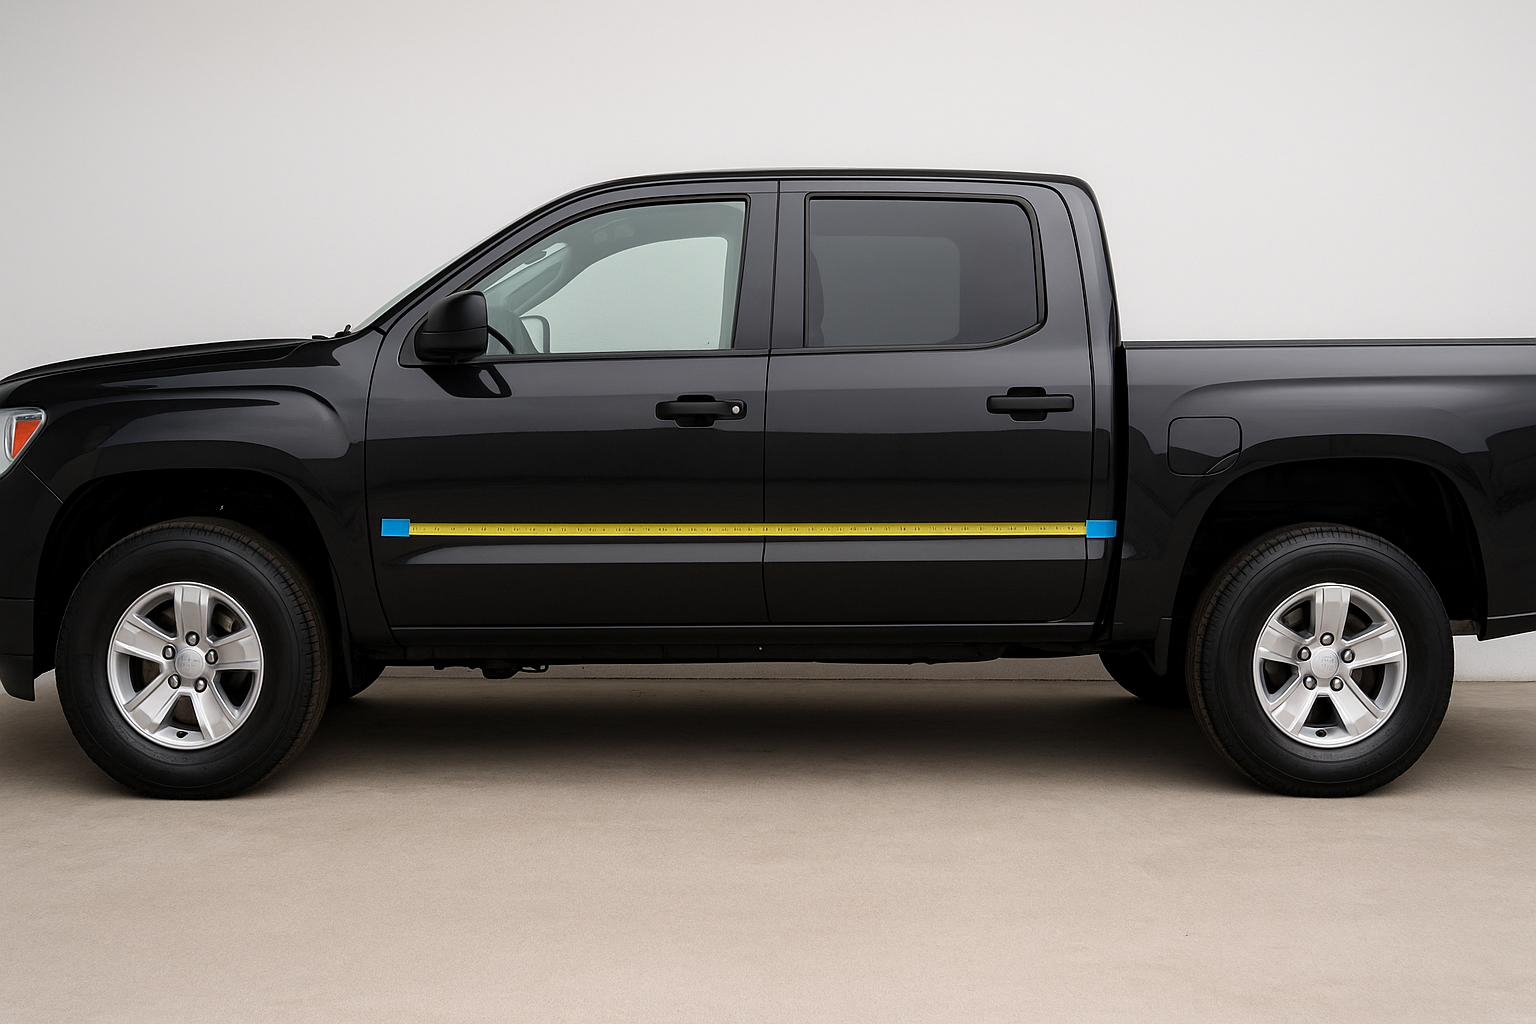
- Measure length (straight line). Measure straight between your two tape marks—do not follow flares/arches. This straight measurement is the baseline for your decal length.
- Add bleed for curves/edges. Add +2–4 in for curvature and slight wrap at seams.
- Measure height if needed. For stripes/graphics with vertical height, measure across door seams/indentations to confirm clearance.
- Record everything. Note final length/height and snap a quick photo of your tape marks.
Step-by-Step Measurement for Boats
- Clean the area so hull lines and edges are easy to see.
- Choose start/end points. For side graphics, start a few inches behind the bow curve; finish before transom/swim platform hardware.
- Measure along the intended path. Use a flexible tape; if it can’t follow the curve, take a straight-line length and add +2–4 in for curvature.
- Crossing surfaces? If wrapping from hull to deck or across chines, measure that path and add extra for transitions.
- Note interruptions. Mark hatches, cleats, vents, and handles that may require cutouts or minor placement shifts.
Special Considerations for 3–10 ft Decals
- Print size sensitivity: The longer the decal, the more visible small errors become—measure twice.
- Orientation & seams: If spanning multiple panels, consider splitting into segments and measure each separately.
- Handling: Long pieces are harder to align; plan measurements with installation in mind.
- Surface continuity: Avoid heavy ridges/complex shapes where possible; they can distort the graphic.
Installation Readiness: Prep Before You Apply
- Clean & dry thoroughly: No dust, wax, or residue.
- Check temperature: Install within the manufacturer’s recommended range (often around 60–74 °F).
- Dry-fit with tape: Hinge the decal with masking tape, verify alignment, then begin application.
- Apply methodically: Work from one end, squeegee air out as you go, and allow gentle stretch around mild curves.
For detailed tips, see our Vehicle Graphics Installation Instructions.
Common Mistakes & How to Avoid Them
| Mistake | Consequence | How to Avoid |
|---|---|---|
| Under-measuring length | Decal too short; visible gaps | Add 2–4 in bleed; measure twice |
| Ignoring curves & contours | Mismatched fit, wrinkles, lifting | Measure straight, then add allowance for curvature |
| Poor surface prep | Weak adhesion, early peeling | Clean, dry, install within recommended temperature |
| No alignment marks | Crooked placement | Use a masking-tape hinge and a level/straight edge |
Why This Matters for Your Branding & Visual Impact
Large decals (3–10 ft) make a strong visual statement—whether promoting a business on a truck, adding custom graphics to a boat, or enhancing a car’s look. Getting the measurement and application right ensures maximum impact, durability, and a professional appearance. Mis-measurement or poor application risks wasted material, extra cost, and a less-than-optimal look.
Quick Recap & Final Tips
- Measure twice, record accurately.
- Add extra length/bleed for curves, edges, and transitions.
- Clean and prep your surface.
- Use masking tape and proper tools for alignment.
- Plan the project—10 ft is a big install.
- Take a photo of your vehicle and measurements before installation for reference.
FAQs
Q1: Can I order a decal exactly the length I measured?
Yes—order the custom length that matches your measured figure plus any extra allowance you’ve decided for curvature or wrap. Provide the exact dimension to your supplier.
Q2: How much extra should I add for curves or bleed?
It depends on surface complexity. As a general rule, add 2–4 inches for mild curves; use more for major contours or wrap-around edges.
Q3: Will a 10 ft decal be too big for a car?
It depends on the car’s size and placement. A 10 ft run may span multiple panels; consider splitting into manageable segments and measure each section individually.
Q4: Do I need professional installation for a long decal?
DIY is possible, but longer decals—especially on boats or trucks—benefit from professional alignment, bubble management, and curve handling.
Q5: Can I apply decals in cold weather?
Most vinyl adhesives perform best in moderate temperatures (often around 60–74 °F) on clean, smooth surfaces. Cold installs can reduce adhesion and increase lifting risk.
Q6: How long will a properly measured and applied long decal last?
With correct measurement, prep, and quality materials, you can expect several years of good performance. Lifespan varies with environment, UV exposure, material grade, and maintenance.
Conclusion
Measuring your car, truck, or boat for long vinyl decals (3–10 ft) seems simple, but doing it right makes all the difference. From gathering the right tools and taking accurate dimensions, to accounting for curves and prepping the surface—each step contributes to a professional result. Take your time, record numbers carefully, order the right size, and you’ll be ready for a flawless application.


Leave a comment (all fields required)