
Applying a decal is easier than you think! With our easy-to-install decals, you can do it in the comfort of your driveway, with only a few common household supplies.
Here are the steps to follow:
Getting Started
Getting started with your decal installation is easy. All you need is some masking tape, a pair of scissors, a lint-free cloth, some rubbing alcohol, a ruler, and the squeegee we provide you with. When your decals first arrive in a shipping tube rolled up you should let them unroll naturally by placing them on a clean flat surface area that's room temperature for 24 hours before installation. When your decal is free of creases, you can then start to clean your vehicle’s surface to remove any dirt or grime. By combining one ounce of liquid dishwashing detergent with one gallon of warm water, you can get a clean and chemical-free surface that will allow the decal to stay put. Then just simply dry the surface with a clean, lint-free towel to ensure there’s no moisture left on the vehicle. Lastly, wipe with some rubbing alcohol to ensure a spotless and streak-free surface, and finally, you’re ready to begin the application process.
For vinyl cut decals, you should spray the surface with a water soap mix. For printed vinyl decals you should do a dry install - no spray necessary.
Measuring and Positioning
For best results, you should only apply a decal when there is little to no wind outside, and the temperature is above 13 degrees Celsius. When you have optimal conditions, and you’re all set up with the necessary supplies and a clean vehicle, you can start to measure and position the decal.
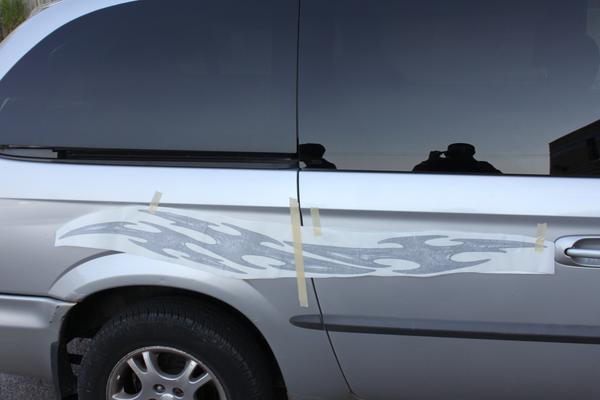
Step One - keep the backing on the graphic and place it up to your vehicle to measure it. Use some small pieces of masking tape to apply to the corners, and then step back and make sure it’s straight. When you’re confident that it’s straight, apply a long piece of masking tape vertically from top to bottom along the middle of the graphic.
Removing the Backing
Once your graphic is secure, you can begin to remove the backing paper starting at the upper left-hand corner. Pull slowly down at a 45-degree angle towards the lower right-hand corner. As you pull it off make sure to use the squeegee to smooth out any bubbles or wrinkles. And once you reach the tape in the middle, you can start to remove the small pieces of tape at the left side of the decal.
Cutting the Paper
The next step involves using the scissors to cut the backing paper off at the center. This will give you the room you need to squeegee the decal area from the left to the center. Use firm pressure and even strokes with the squeegee at a 45-degree angle to remove any imperfections. Once finished, you can start following the same steps on the right-hand side before removing the last bits of tape.
Removing the Application Tape
Once the backing paper has been removed, and your decal is looking smooth and wrinkle-free, it’s now time to start carefully removing the application tape. This time start at the top right corner and slowly peel it at a 45-degree angle downwards. If an area lifts during this process, stop and use your thumb or squeegee to press it back down. Once finished, use the squeegee to do some final smoothing and to ensure the adhesive is nice and strong.
Aftercare Advice
To keep your graphic looking as new as the day you got it, avoid using any harsh chemicals, high-pressure washers, and any chemicals on or around the decal, like aromatic solvents. You can also improve the lifespan of the decal by keeping it out of the sun and away from any heat.
There you have it! Installation is as easy as 1,2,3 with our decals.


Leave a comment (all fields required)